아래의 2가지 방법을 통해, 스프링 시큐리티 디버그 모드 활성화 및 디버그 내용을 콘솔에 출력하여 디버깅을 쉽게 진행할 수 있다.
진행했던 개발 환경
- SpringBoot: 3.2.0
- SpringSecurity: 6.2.0
1. @EnableWebSecurity 에 설정
@Configuration
@EnableWebSecurity(debug = true)
public class SecurityConfig {
	// Spring Security 관련 Config 코드 ...
}
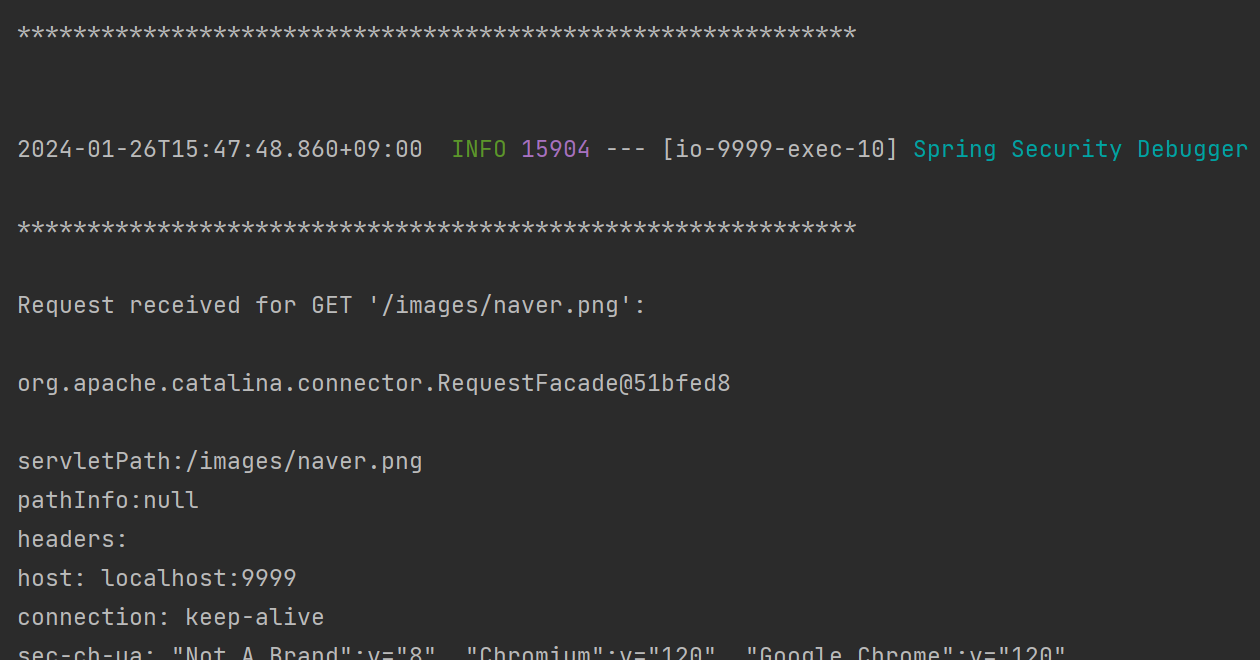
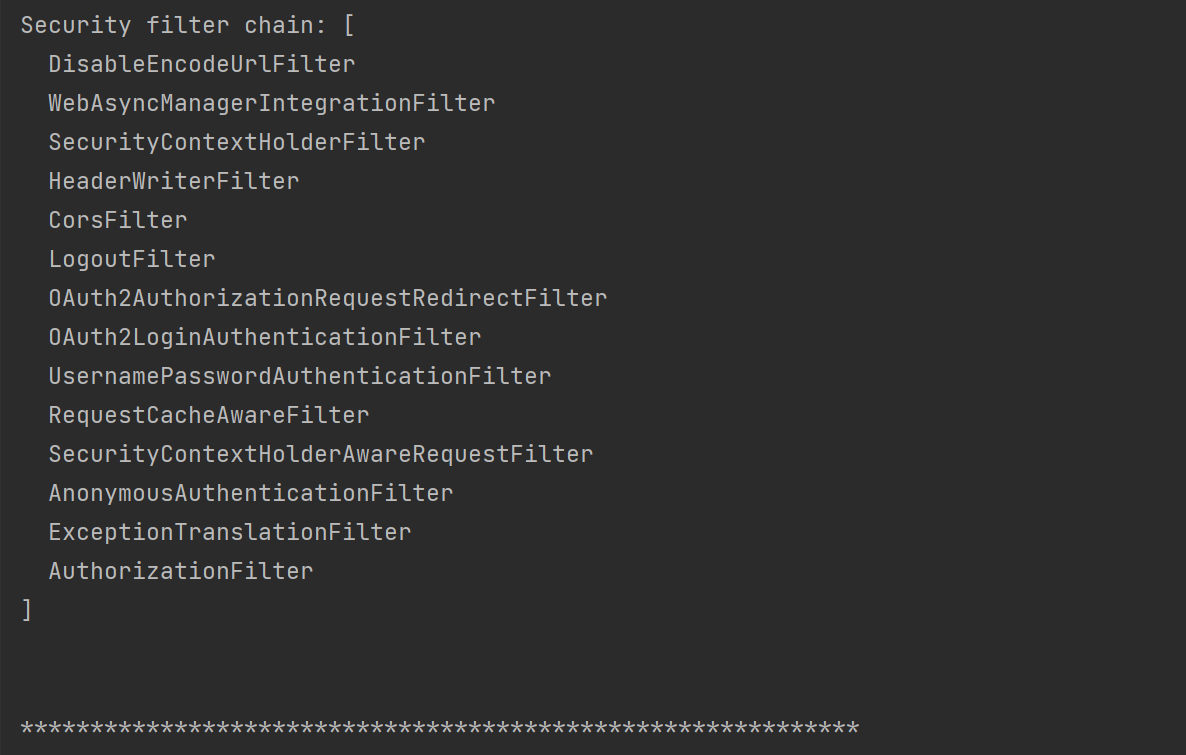
위와 같이 debug 모드를 활성화 한 후 애플리케이션을 실행해주면, 콘솔에 아래와 같은 내용이 출력되는 것을 확인할 수 있다. 민감한 정보를 담고 있으니, 실제 배포 시스템에서는 활성화하지 말라는 문구도 함께 확인할 수 있다.
하지만, 이 방법은 빌드할 때마다 코드를 수정해야 하는 번거로움이 있어 아래의 두 번째 방법을 사용하는 것을 추천한다.
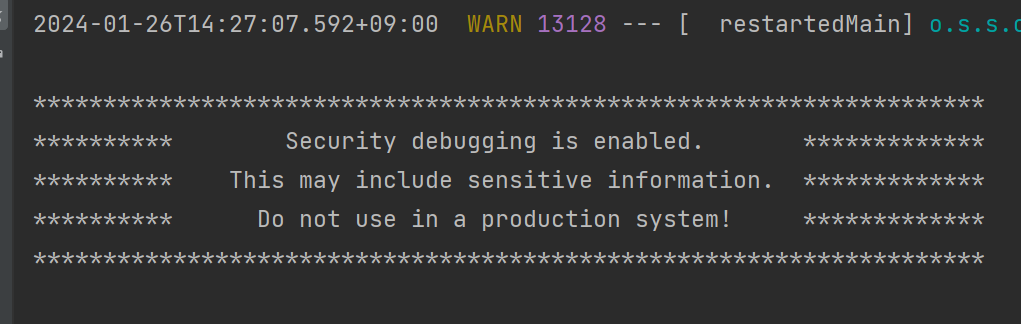
디버그 내용 콘솔 출력
2. application.properties 설정 파일 이용(추천하는 방법)
application.properties에 원하는 값으로 설정을 작성한다.

이후, @Value 어노테이션을 사용하여 application.properties로부터 설정값을 읽어온다.
application.properties에 스프링 시큐리티 디버그 관련 설정이 없을 경우,
securityDebug의 기본값은 false가 된다.
application.properties 설정 파일을 이용하면 스프링 프로필 별로 설정값을 적용할 수 있기에 훨씬 효율적이다.
@Configuration
@EnableWebSecurity
public class SecurityConfig {
    // application.properties 에서 읽어온다.
    // "spring.security.debug" 관련 설정이 없을 시, false 가 기본값이 된다.
    @Value("${spring.security.debug:false}")
    boolean securityDebug;

    @Bean
    public WebSecurityCustomizer webSecurityCustomizer() {
        return (web) -> web.debug(securityDebug);
    }


    // Spring Security 관련 Config 코드 ...
}
[참고]
반응형
'IT > SpringBoot' 카테고리의 다른 글
| [SpringBoot] ... is deprecated and marked for removal (2) | 2024.01.21 |
|---|---|
| [SpringBoot] Cannot resolve method 'antMatchers' in 'ExpressionInterceptUrlRegistry' (0) | 2024.01.19 |

